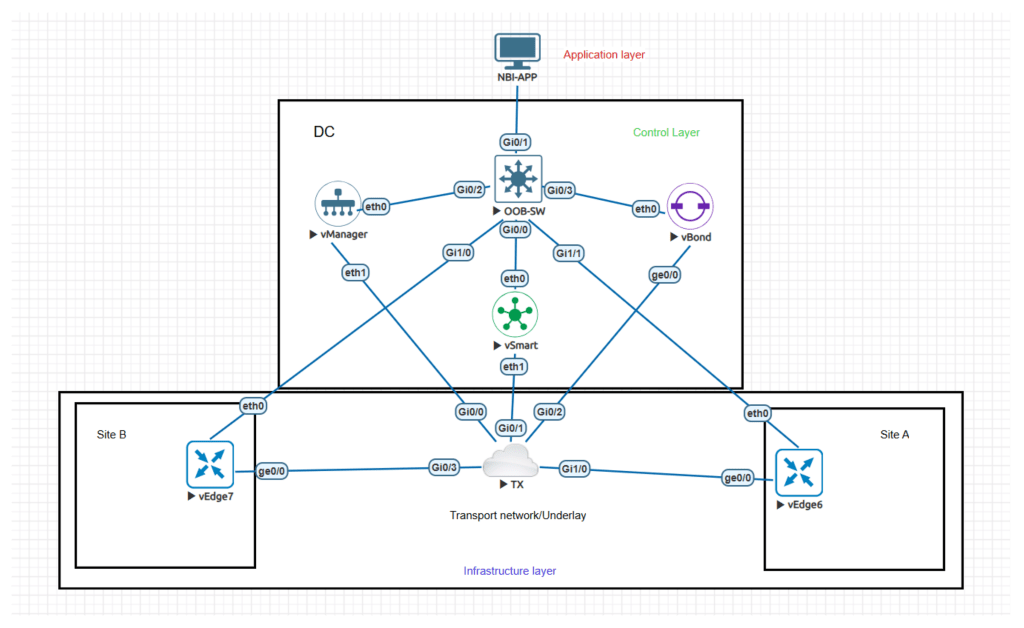
Based on SDN philosophy Cisco CATALYST SDWAN has 3 layers namely:
- Infrastructure layer, where data plane resides with underlay network, which mainly deals with switching of packets based on control\plane decisions. Infrastructure layer is connected to control layer via southbound APIs.
- Control layer which consists of the control plane and has 3 controllers manager also known as v-manage this acts as NMS and provides management and visibility to the entire SDWAN fabric and control plane, controller also known as v-smart that dictates the control decisions of the fabric, like building tunnels and routing decisions and enforcing policies, and orchestrator also known as v-bond that ties all the components of the fabric together authenticates and enrolls them to the fabric.
- The third layer is application layer that interfaces with user to provide the access to the SDWAN fabric for administration, control and monitoring via northbound APIs.
SDWAN follow the principal of ZTNA, which requires all SDWAN components to be whitelisted before connecting to the fabric.
The components need to be certified to join the fabric.
The following demonstration shows how can we turn up the SDWAN fabric in detail, however, to learn extensively about cisco SDWAN please follow the official cisco SDWAN informative resources.
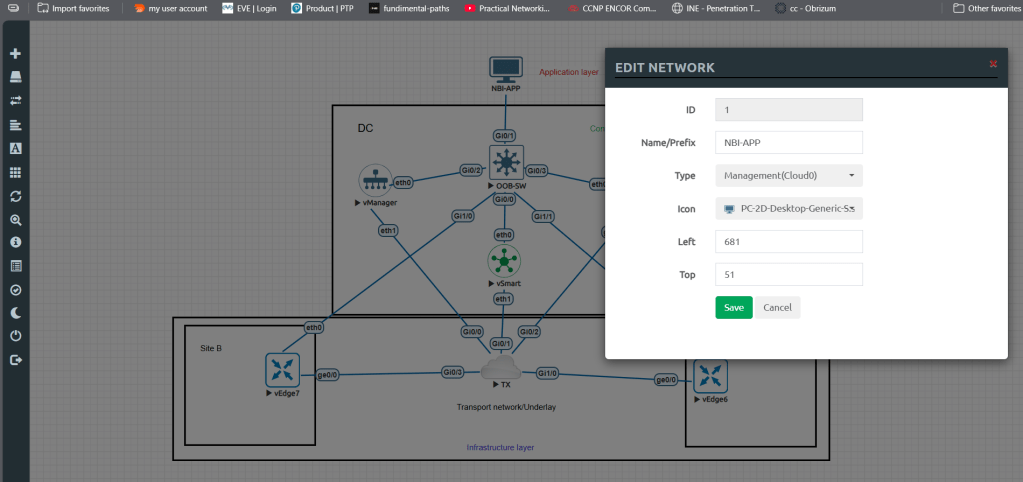
Below is the topology that was built in EVE-NG simulator to create the SDWAN fabric, I am using cisco SDWAN 18.4 (older version) for demonstration.
The IP schema is as mentioned below:
For OOB management I am using DHCP with mgmt. adaptor from EVE-NGs connection so that I can access the URL of the manager also known as v-manage.
The subnet 10.0.0.0/24 was used as TX subnet for VPN0.
Orchestrator VPN0 IP: 10.0.0.11
Manager VPN0 IP: 10.0.0.10
Controller VPN0 IP: 10.0.0.12
Once the components are up and running, console into the manager/v-manage node and configure with below commands. (organization name, organization id and vbond IP should be same in all the 3 components system configs)
confsystemsystem-ip 100.100.100.101site-id 1001organization-name "DevNet Learning Lab"vbond 10.0.0.11vpn 0no interface eth0interface eth1ip add 10.0.0.10/24tunnel-interfaceexitno shutip route 0.0.0.0/0 10.0.0.1vpn 512interface eth0ip dhcp-clientno shutcommit and-quitThen use vshell that is command line shell using “vshell” command to generate the certificate key, here we are using manager to certify all the components of SDWAN.
openssl genrsa -out ROOTCA.key 2048Then, generate .pem using below command:
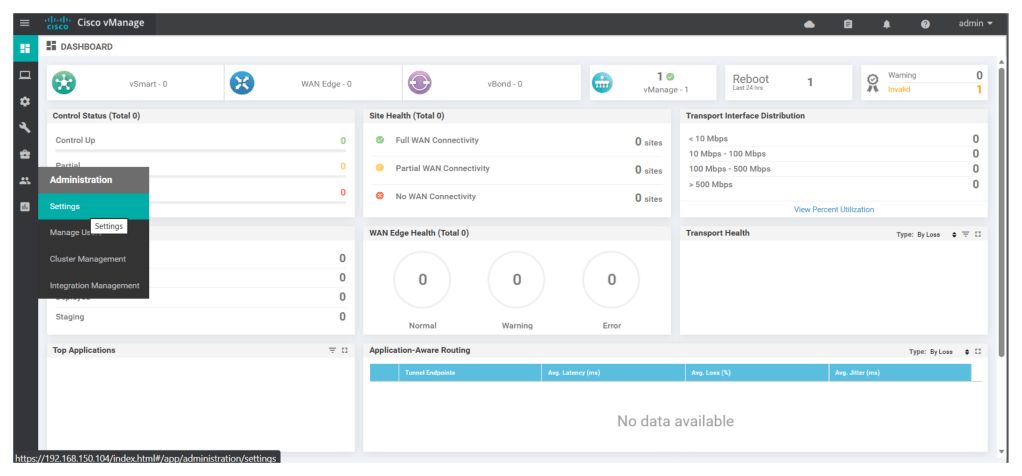
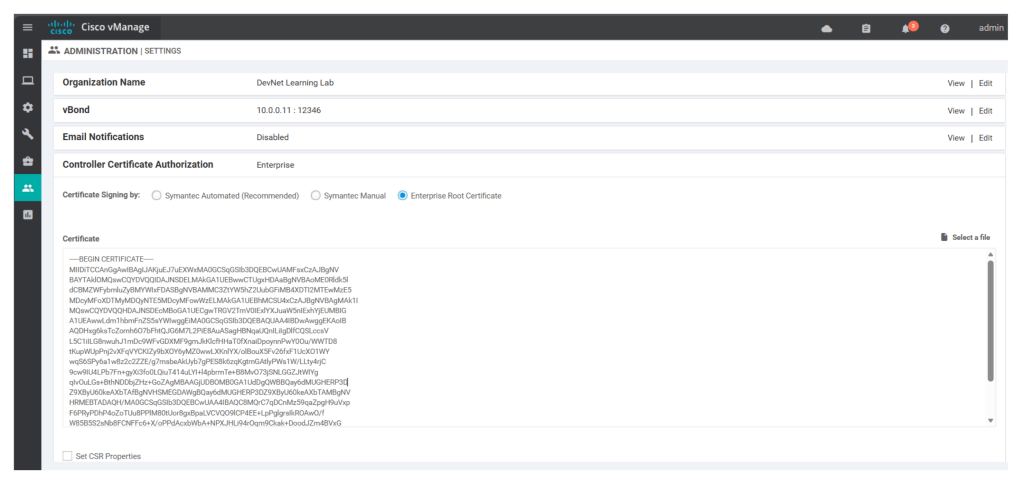
openssl req -x509 -new -nodes -key ROOTCA.key -sha256 -days 2000 -subj '/C=IN/ST=MH/L=MH/O=DevNet\ Learning\ Lab/CN=vmanage.lab' -out ROOTCA.pemUpload the .pem file content in the Administration> Settings under Controller Certificate Authorization (choose Enterprise Root Certificate option), click on import, also remember to enter org name and orchestrator IP address/v-bond IP address.
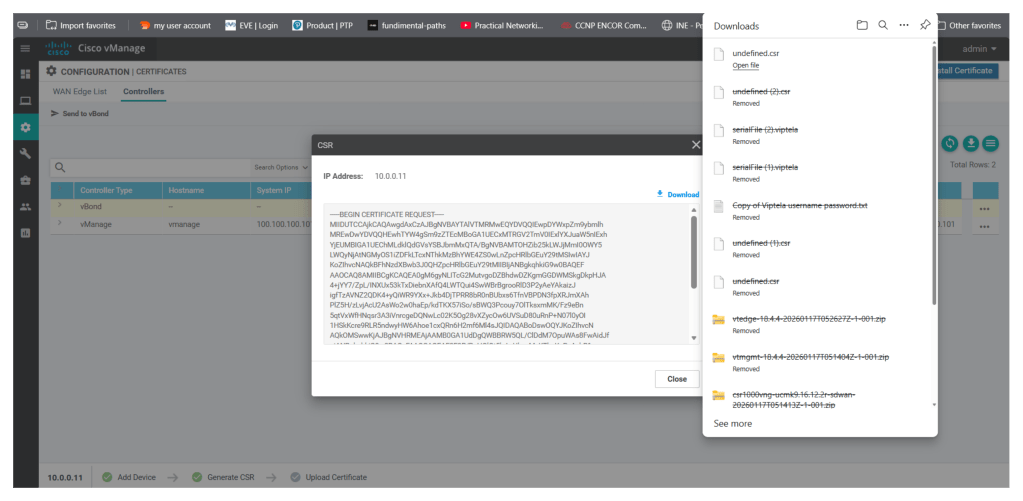
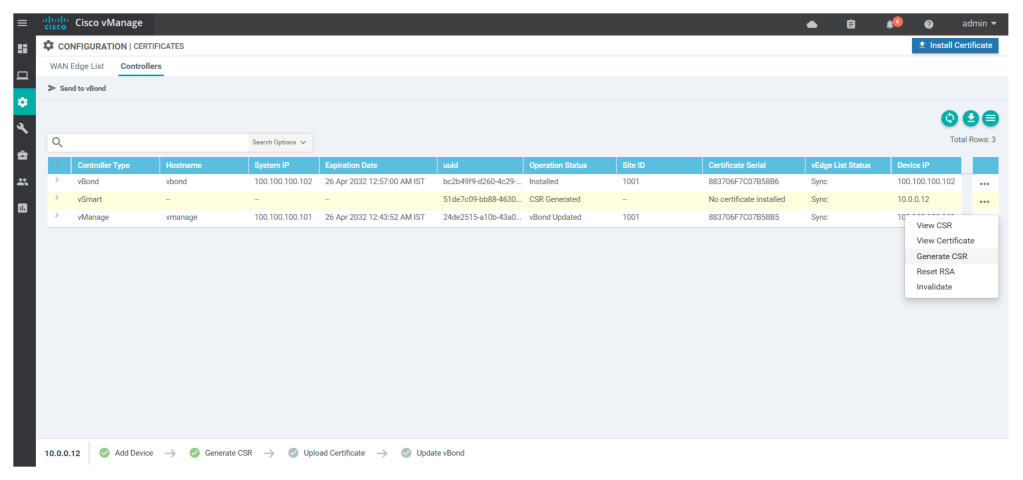
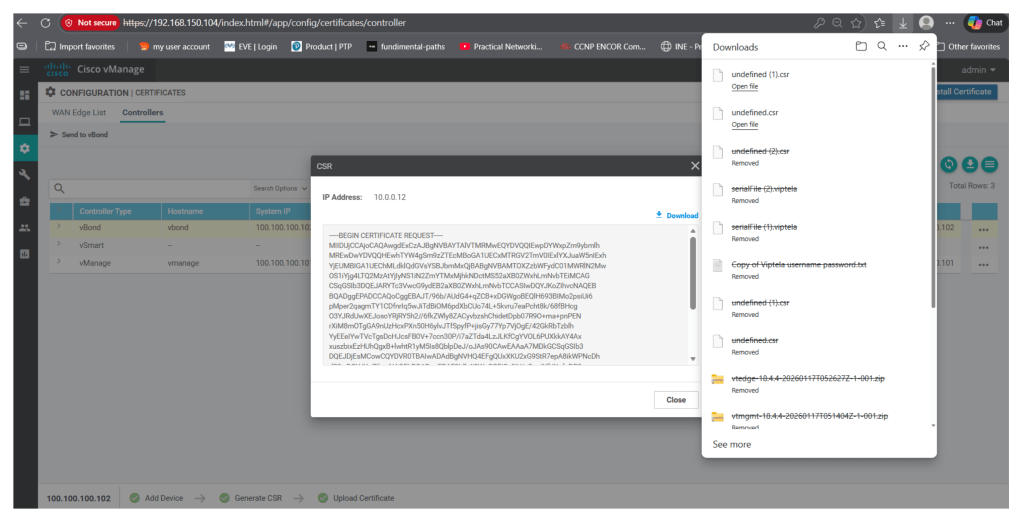
Now click on generate CSR under Configuration > Certificates > controllers
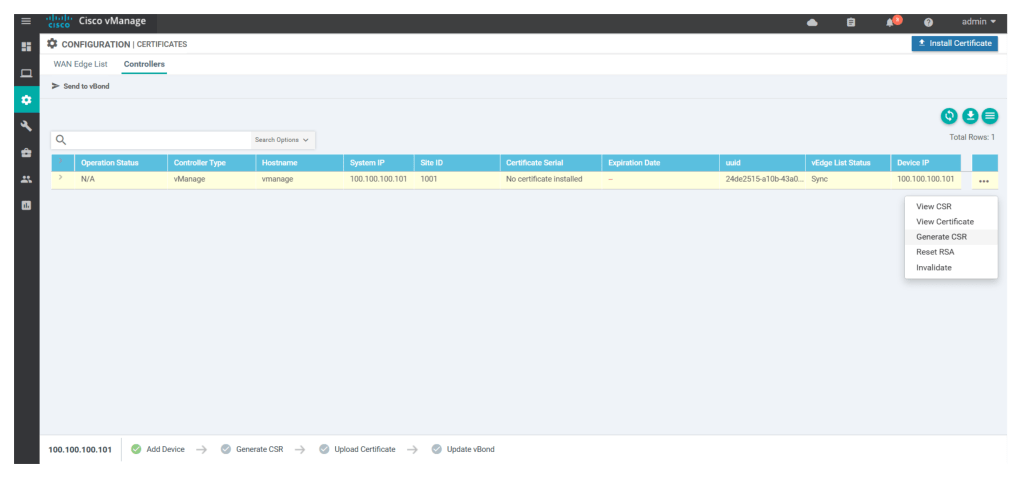
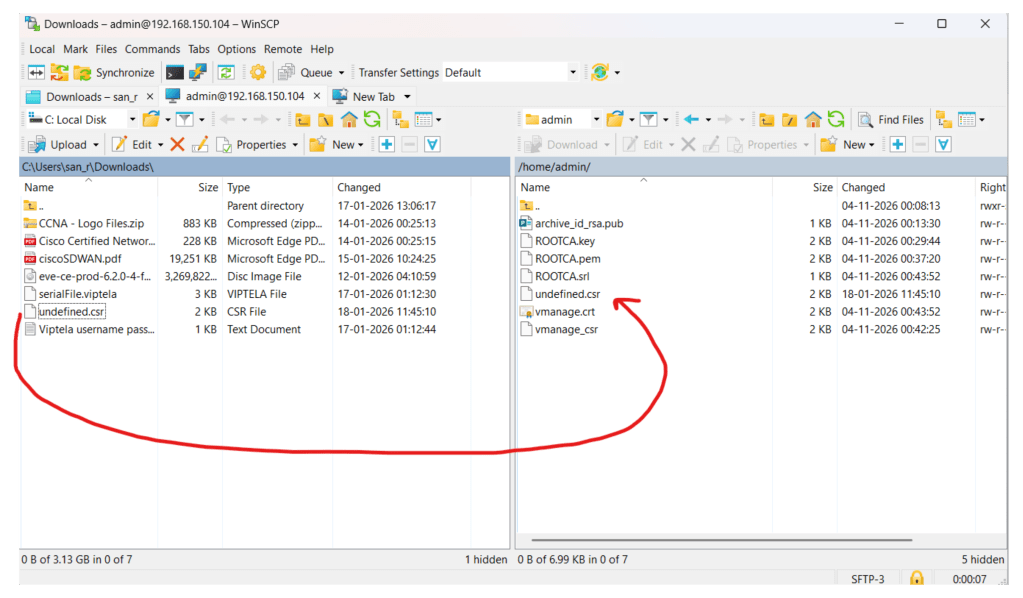
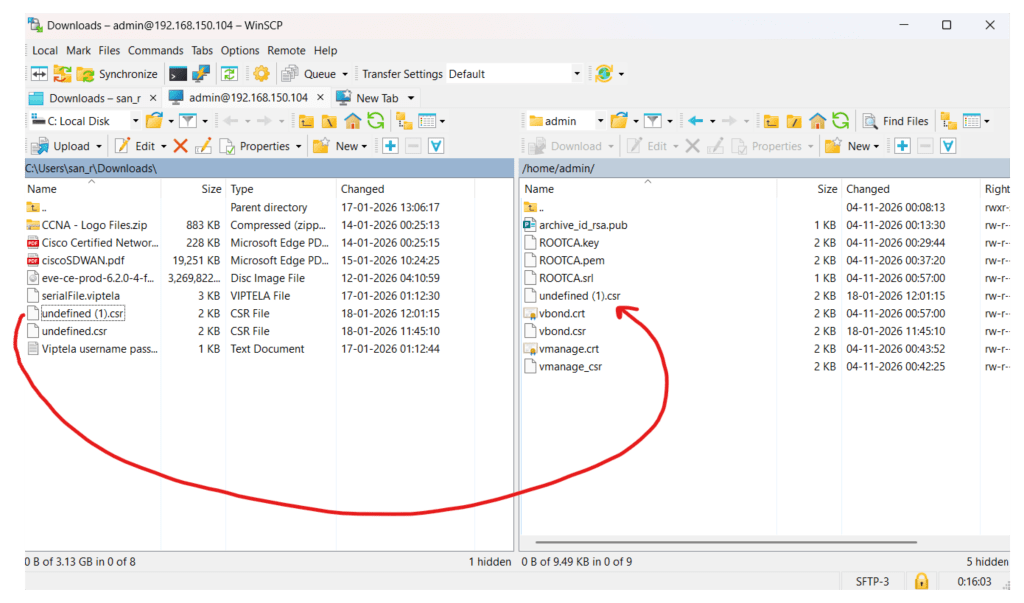
Once the CSR is generated, download it and then import it to v-manage/manager using any file transfer tool like WINSCP or FILE ZILLA
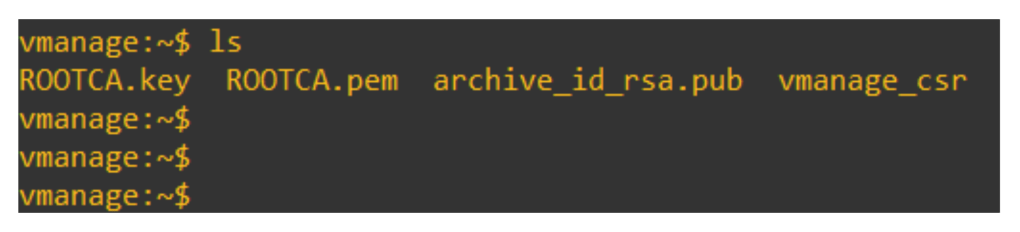
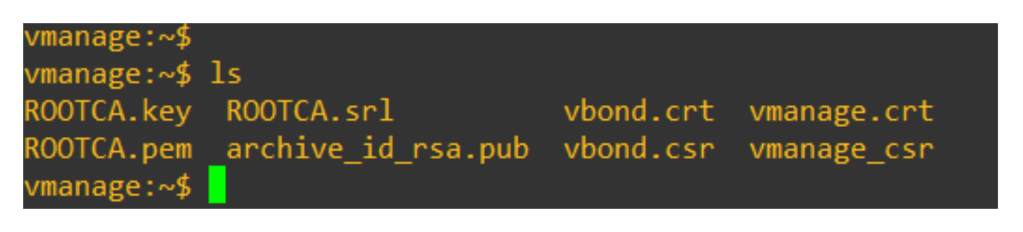
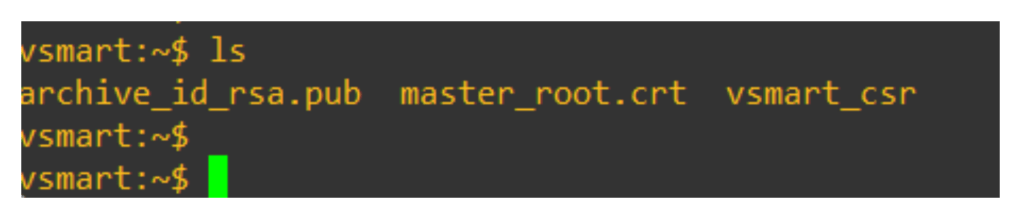
In vshell verify is the vmanage_csr file is generated or not
Using vmanage_csr we have to generate the v-manage certificate, using below command:
openssl x509 -req -in vmanage\_csr -CA ROOTCA.pem -CAkey ROOTCA.key -CAcreateserial -out vmanage.crt -days 2000 -sha256
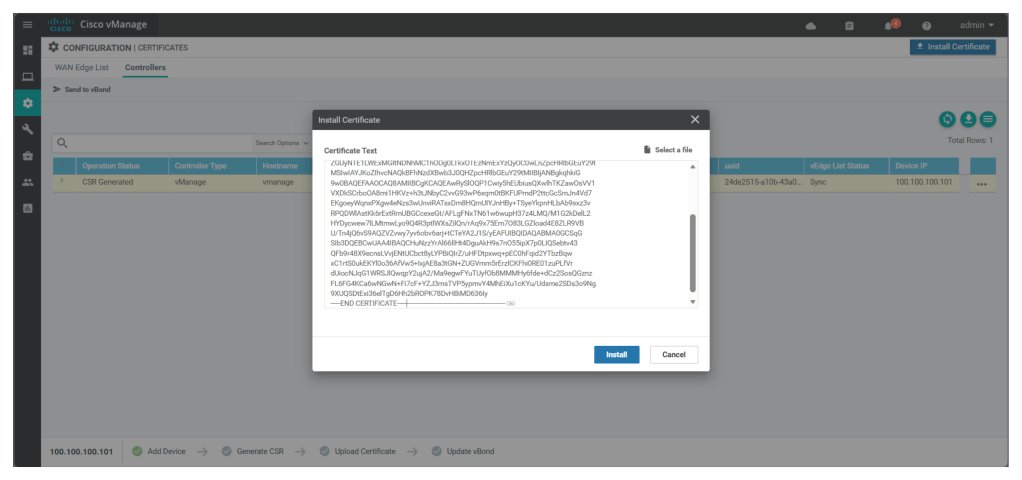
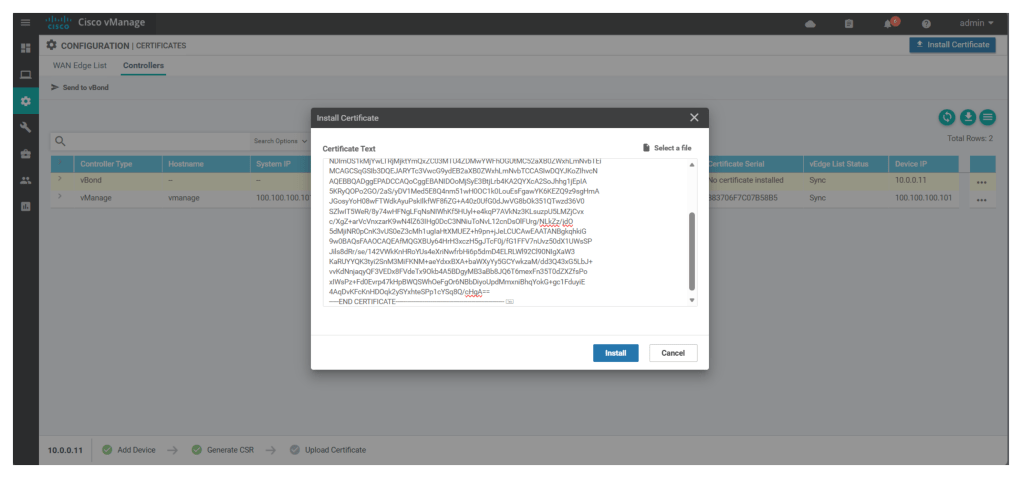
Now copy the content of the vmanage.crt and under Configuration > certificates > Controllers > Import Certificates in the UI
Now configure v-smart/controller node cli with below commands;
configsystemhost-name vbondsystem-ip 100.100.100.102site-id 1001organization-name "DevNet Learning Lab"vbond 10.0.0.11 local vbond-onlyvpn 0interface ge0/0no tunnel-interfaceip add 10.0.0.11/24no shutip route 0.0.0.0/0 10.0.0.1vpn 512interface eth0ip dhcp-clientno shutcommit andNow add v-bond/orchestrator details under Configuration > Controllers > add controllers > vBond, entering IP address, ID and Password of v-bond/orchestrator
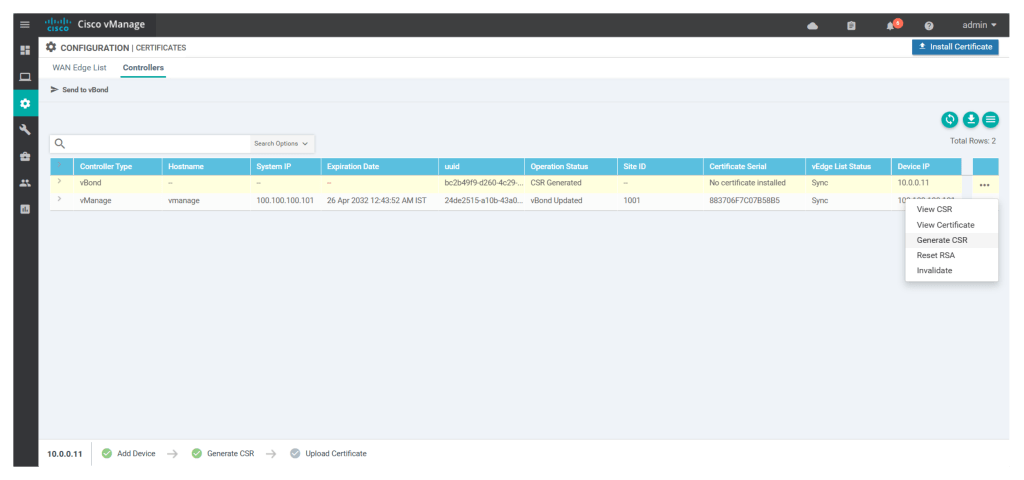
Once we add v-bond/orchestrator to the controller we have to generate the CSR for the v-bond by clicking on
Login to v-bond/orchestrator and validate if the vbond_csr is generated or not

Now from the UI itself from Configuration > certificates > Controllers click on 3 dots and view CSR for v-bond and download the CSR
Import the CSR in v-manage using any file transfer tool, I am using WINSCP
Once the file is transferred to the v-manage, login to v-manage vshell and rename the csr file as vbond.csr and run below command to generate vbond .crt file, that is the certificate for v-bond.
openssl x509 -req -in vbond.csr -CA ROOTCA.pem -CAkey ROOTCA.key -CAcreateserial -out vbond.crt -days 2000 -sha256
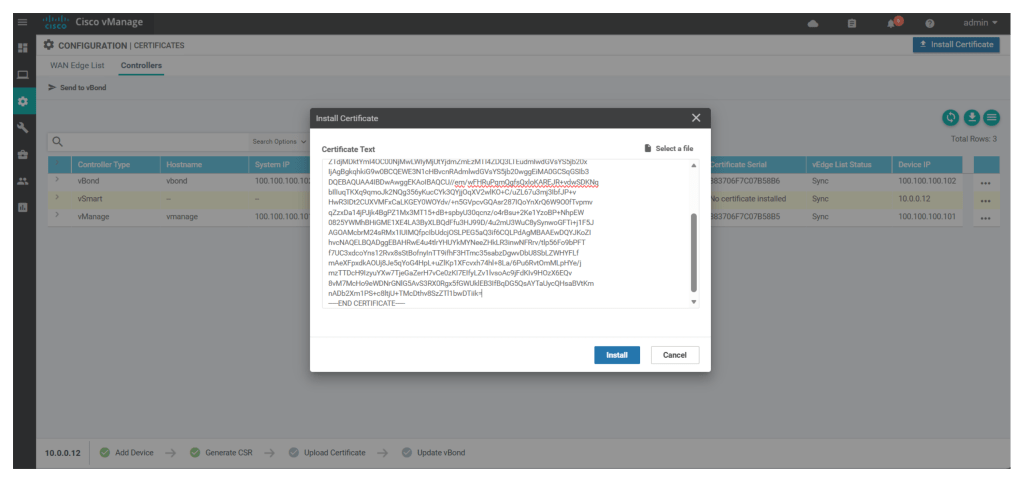
Once the vbond.crt file is generated, copy the content of the vbond.crt

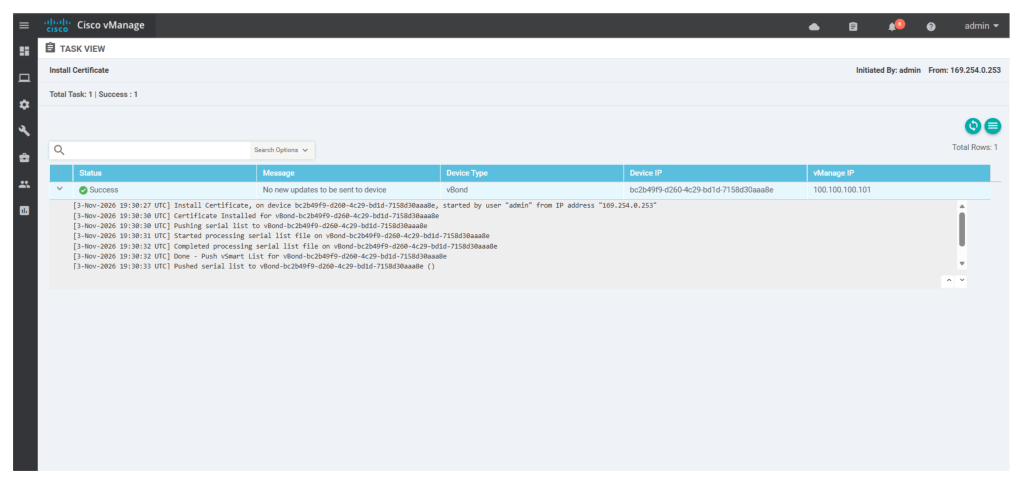
In UI, under Configuration > Certificates > controllers click on import certificates paste the content and click install
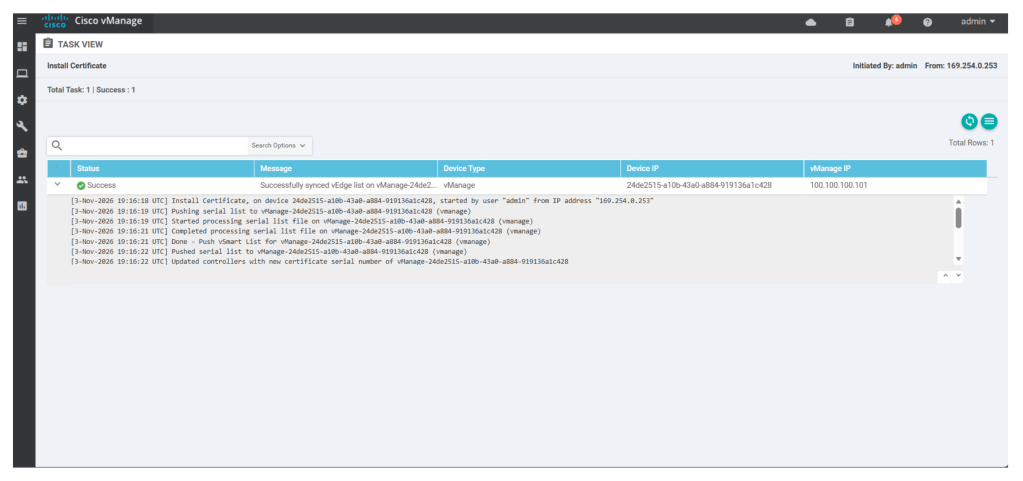
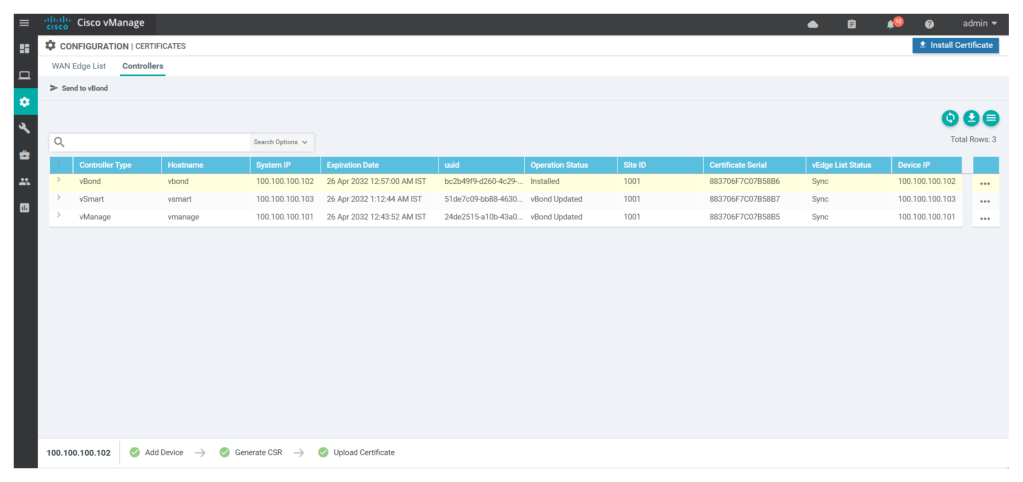
When the import is seen successful as shown below, we see that the status of v-bond is seen as installed.
Now configure tunnel configs for v-bond interface
conf tvpn 0interface ge0/0tunnel-interfaceencapsulation ipsecexitno shutdowncommit and-quitNow login to v-smart cli and then configure the v-smart using the using the CLI with below command:
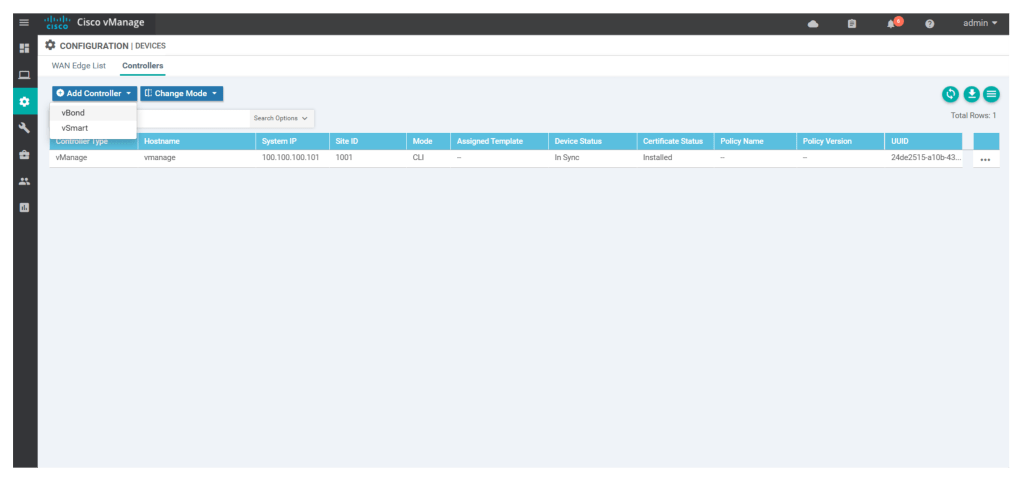
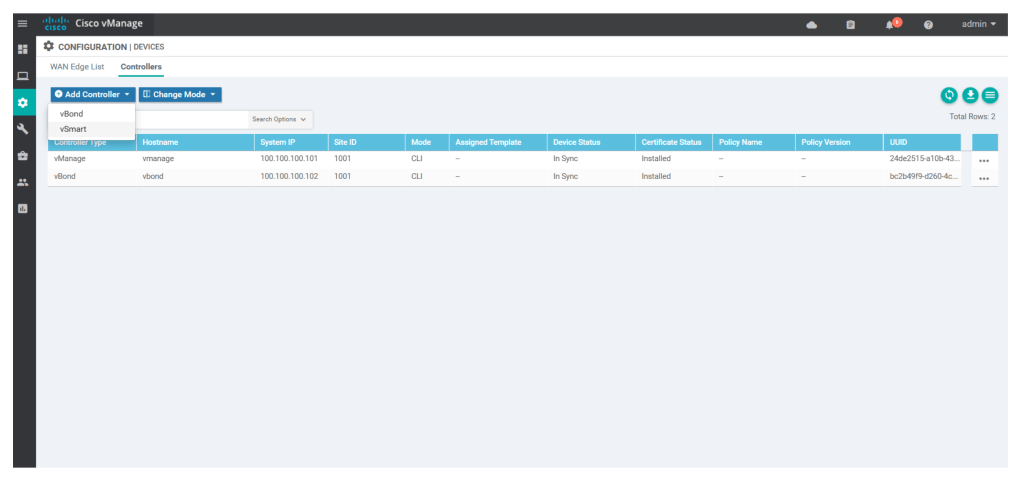
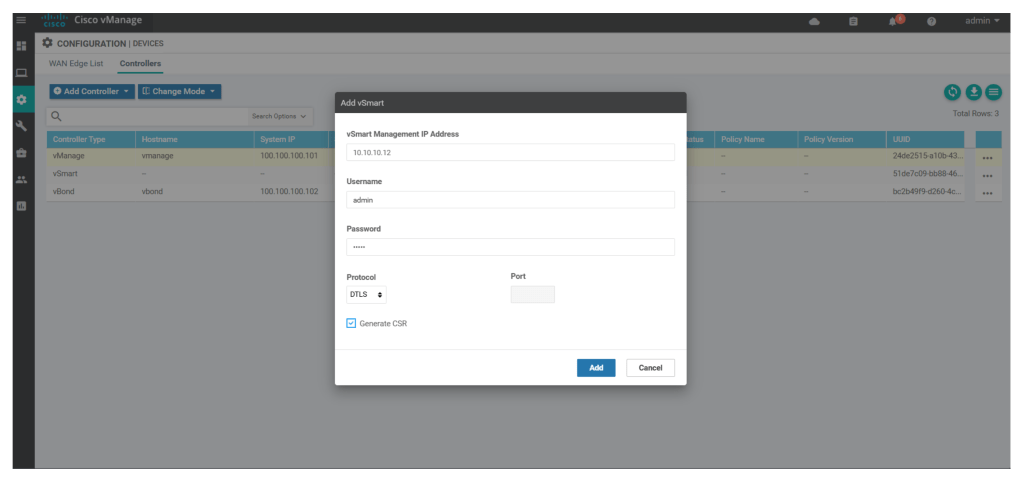
configsystemsystem-ip 100.100.100.103site-id 1001organization-name "DevNet Learning Lab"vbond 10.0.0.11vpn 0no interface eth0interface eth1ip add 10.0.0.12/24no shutip route 0.0.0.0/0 10.0.0.1vpn 512interface eth0ip dhcp-clientno shutcommit andSimilar to v-bond add v-smart under Configuration > devices > controllers, add v-smart
Then generate CSR
Download the CSR
Validate if the csr is generated in v-smart vshell
Then download the csr file

Transfer the csr file to the v-manage:
Rename the csr file as vsmart.csr, and using below command generate vsmart.crt file
openssl x509 -req -in vsmart.csr -CA ROOTCA.pem -CAkey ROOTCA.key -CAcreateserial -out vsmart.crt -days 2000 -sha256
Copy the content of the vsnart.crt
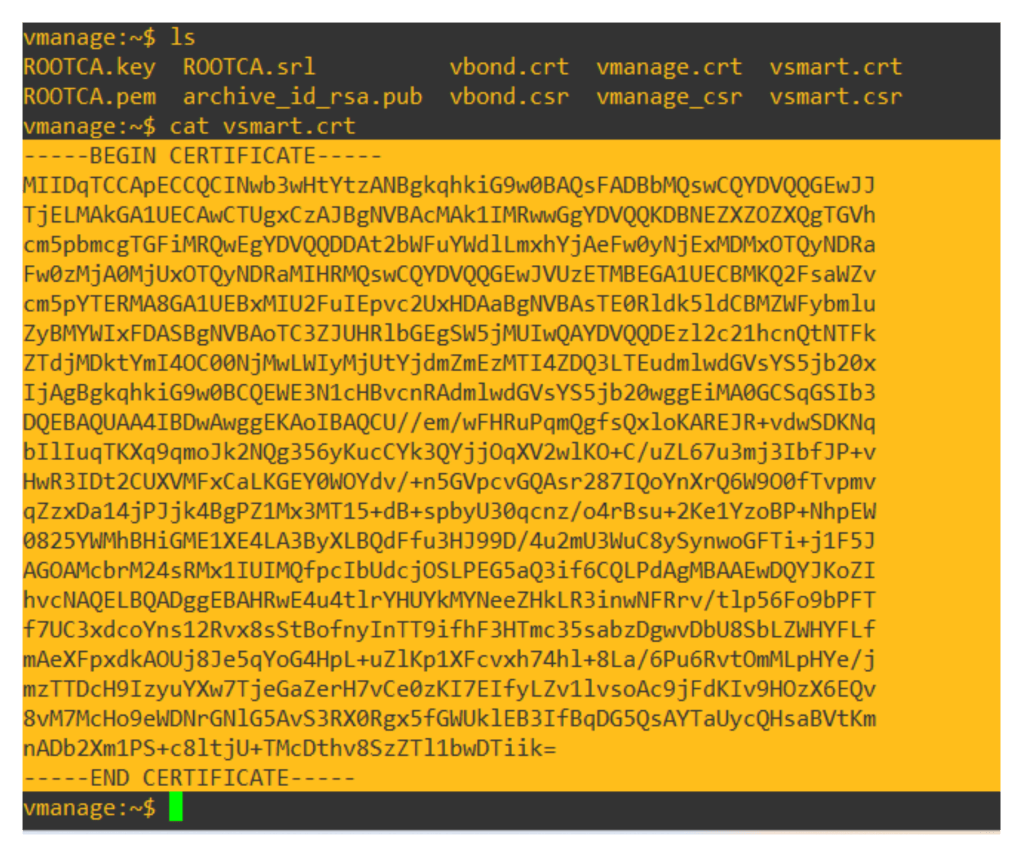
Now upload the content of the vsmart.crt in the UI Configuration > Certificates > controllers > install certificate

Now configure the tunnel interface for the v-smart using below command in the v-smart cli:
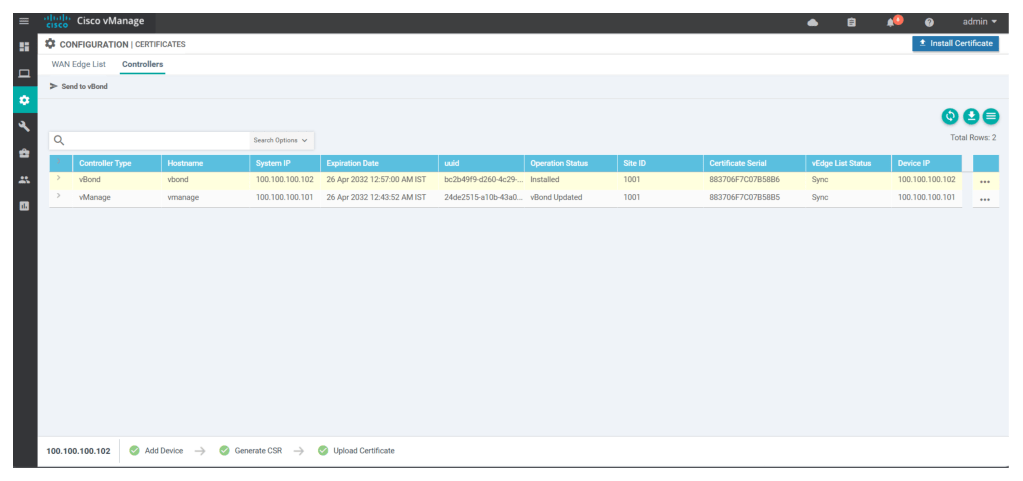
configvpn 0interface eth1tunnel-interfaceexitno shutdowncommit and-quitOnce the v-smart is certified we will see the status of v-smart as “v-bond updated” under configuration > certificates > controllers
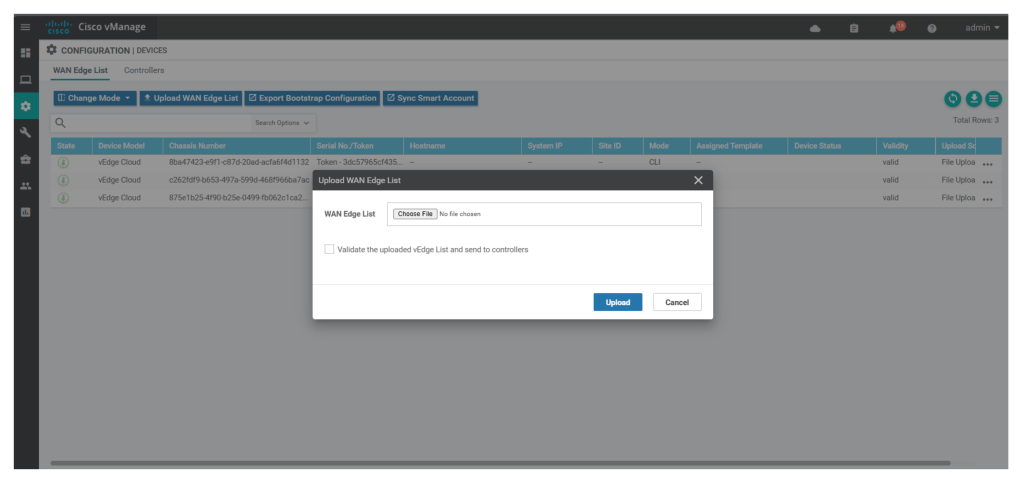
Now we have to onboard the v-edge devices, we will need serial file from cisco PNP portal generated to onboard the v-edge devices. to generate the serial file, we have to create cisco smart account and then by entering organisation name and the v-bond IP address, we can generate the serial file.
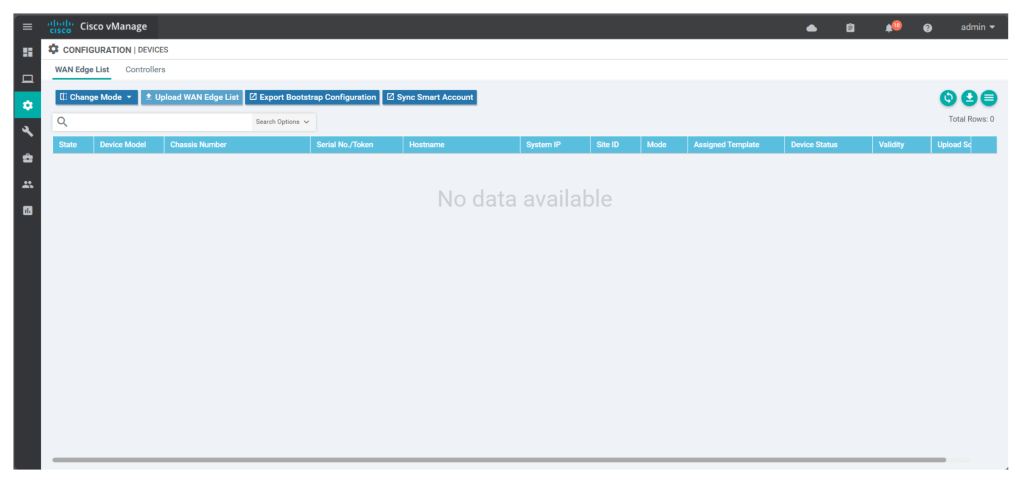
Upon obtaining the serial file we can upload it under Configuration> Devices> wan edge list
Upload the serial file as shown in below screen shot
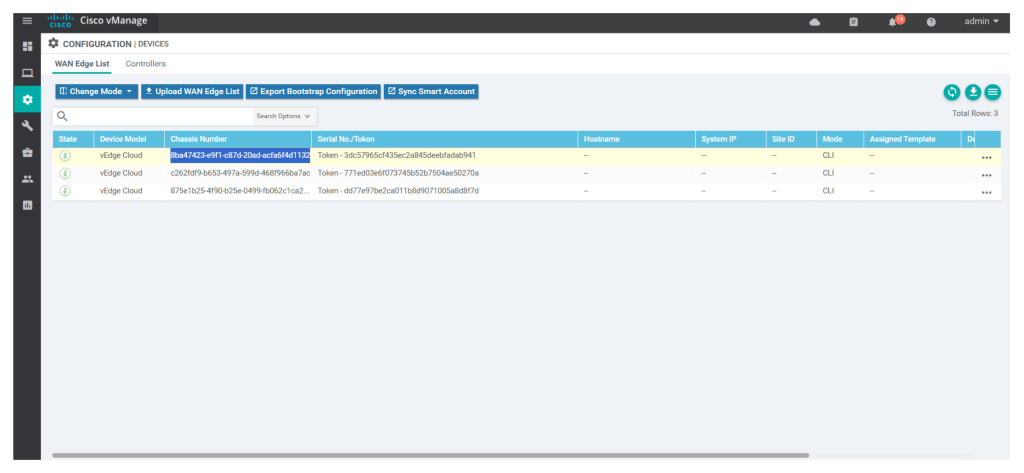
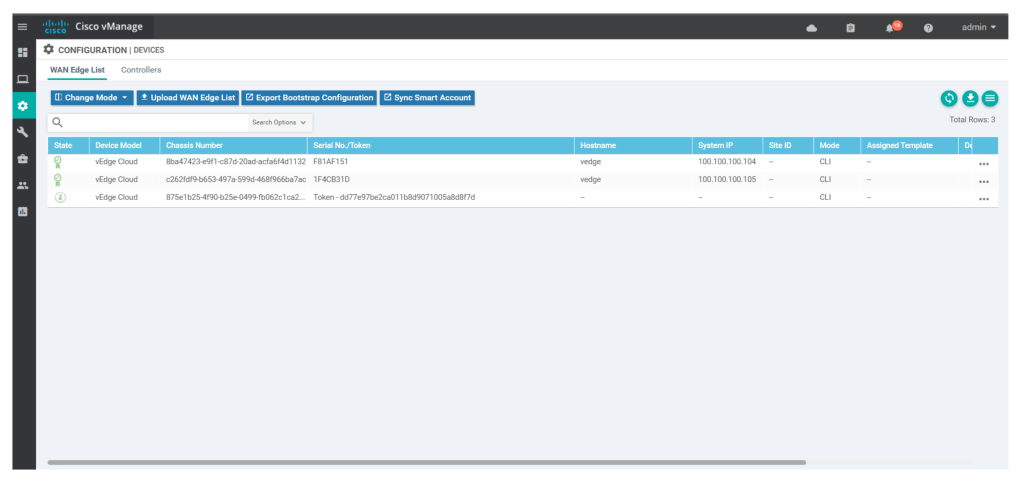
We should see the list of uploaded wan edge devices with UUID and token, under configuration > devices > wan edge list
Now configure v-edge devices using below confs in CLI:
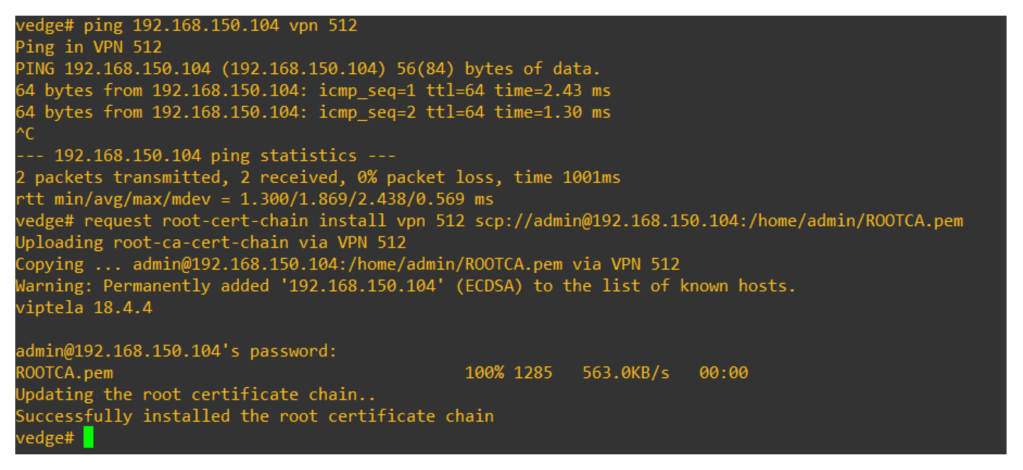
configsystemsystem-ip 100.100.100.104site-id 1002organization-name "DevNet Learning Lab"vbond 10.0.0.11vpn 0no interface ge0/1interface ge0/0ip add 10.0.0.14/24no shuttunnel-interfaceencapsulation ipsecallow-service allno shutip route 0.0.0.0/0 10.0.0.1vpn 1interface ge0/1ip add 192.168.1.10/24no shutvpn 512interface eth0ip dhcp-clientno shutcommit andconfigsystemsystem-ip 100.100.100.105site-id 1003organization-name "DevNet Learning Lab"vbond 10.0.0.11vpn 0no interface ge0/1interface ge0/0ip add 10.0.0.15/24no shuttunnel-interfaceencapsulation ipsecallow-service allno shutip route 0.0.0.0/0 10.0.0.1vpn 1interface ge0/1ip add 192.168.2.10/24no shutvpn 512interface eth0ip dhcp-clientno shutcommit andNow check if we are able to ping the, v-manage OOB IP from VPN 512 and download root chain cert from the v-manage using SCP using below command (note: v-manage IP is 192.168.150.104 obtained via DHCP on OOB interface on VPN 512):
request vedge-cloud activate chassis-number c262fdf9-b653-497a-599d-468f966ba7ac token 771ed03e6f073745b52b7504ae50270aOnce we run the command we can see serial no of v-edge devices instead of the Token number under configuration > devices > wan edge list
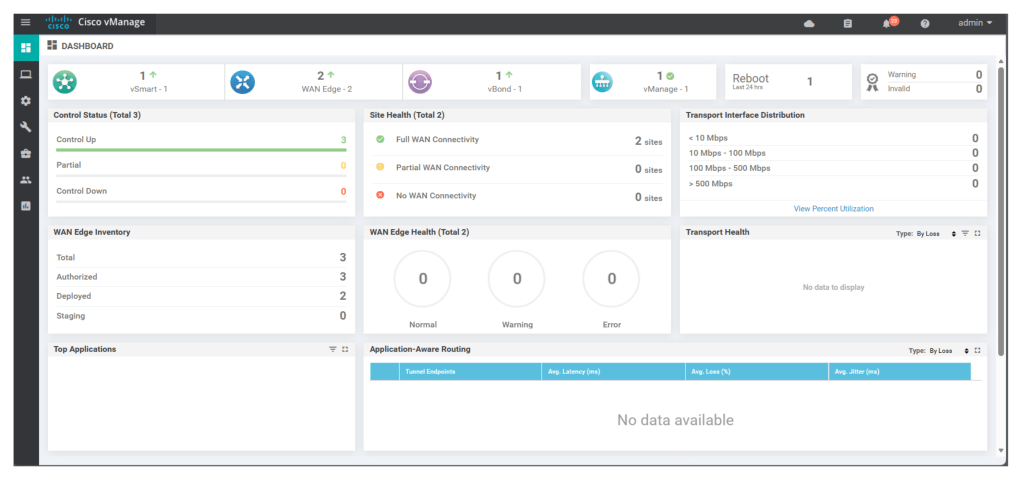
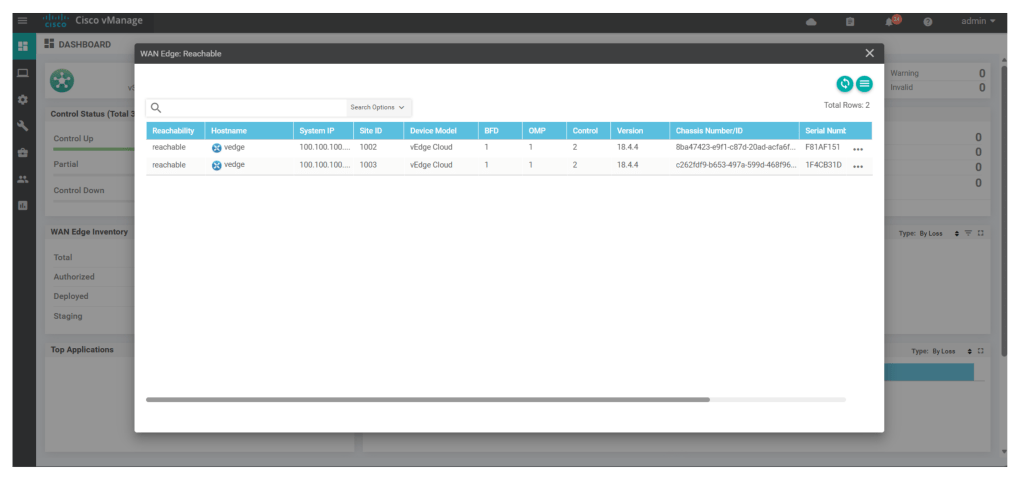
Upon successfully certification of all components, we see all components as part of the fabric in NMS main dashboard: